Showing posts with label munchies. Show all posts

Sunday, November 18, 2018

Date Bites

Here's a very simple and versatile snack option that is healthy, delicious, a complete breeze to make.


Ingredients: (makes about 15-17 balls)
  1. 25-30 pitted dates
  2. 3 tablespoons of unsweetened cocoa powder
  3. 1/4 cup of almonds or nuts of your choice
  4. a splash of vanilla extract
Preparation:
Throw everything together in a mixie or food processor and pulse until the dates and nuts break down and start coming together. Add a little more vanilla extract, if needed to give more moisture and to help speed the mixing process. Scoop into small bite-sized pieces and roll into a ball. Store in an air-tight container in the fridge. 

Friday, September 18, 2015

Ammini Kozhakattai

There many different kinds of savory kozhakattais (rice flour based dumplings). Of the many, ammini kozhakattais are a tasty and cute variation. They are commonly prepared from left-over rice-flour dough that's used to make the traditional sweet and savory kozhakattais. The left-over dough is rolled into small balls, steamed, and flavored with different kinds of spice-mixes. I am sharing three most common ways to flavor them.

Sunday, September 6, 2015

Sabudana Vada / Tapioca Fritters

Sabudana Vadas are delicious deep-fried fritters made with tapioca, potatoes, and peanuts. When I mentioned to one of my friends that this is basically a double-carb deep-fried fest, she balked. It seems almost illegal to make, let alone consume, such decadent food these days. The calorie-police are all over the place :).

But, as I always say, that's why we have special indulgent days in the year in the form of birthdays, anniversaries, and festivals. So, set aside your guilt to try these out during an indulgent evening.

I added a few additional ingredients - onion, cloves, and cardamom - that are not commonly added to sabudana vadas. I couldn't help adding the essential ingredients that spice up masala vadas. But, not to worry, the cloves and cardamom do not overpower the vadas. They bring a subtle flavor and aroma that will intrigue your guests enough to wonder what the "secret" addition is.


Saturday, September 5, 2015

Uppu Cheedai /Savory Seedai

Cheeda/Seedai are festive savory munchies commonly prepared during Gokulashtami (Lord Krishna's birthday) or on Diwali. It is a complement to sweet cheedais prepared with jaggery, rice flour, and cardamom.

The only word of caution while preparing savory cheedais is to exercise extra care while frying them. Cheedais are known to sometimes burst and splutter out of the hot oil because of trapped bubbles of air/moisture. So, drop the balls carefully into the oil and maintain a good distance away during the first minute of frying. Also, make sure to not neglect roasting and sieving the flours, because they are essential steps to make sure the flours are dry and smooth to minimize the risk of spluttering oil.


Tuesday, October 21, 2014

Wheat Thattai

Tomorrow is Deepavali - the Indian festival of lights. As the most celebrated and popular Indian festival, Deepavali symbolizes the entry of light and goodness in everyone's lives. 

Specialized sweets and savories, firecrackers, and shiny new clothes are just some of the many indulgences that the festival brings with it. 

Half away around the world, during a quiet Fall weeknight, people like me celebrate Deepavali by invoking the spirit of warmth and cheer. I usually prepare at least one sweet and savory dish to mark the festival. This time, I thought of trying a slightly different version of thattai - a crunchy snack. Instead of rice flour, I used wheat flour, thanks to the inspiration from Meenakshi ammal's cookbook. 


Sunday, August 17, 2014

Vella Cheedai / Seedai

Today is Janmashtami or Gokulashtami - Lord Krishna's birthday. On this festive day, cheedai/seedais, which are deep-fried balls made primarily with rice flour and black gram flour, are prepared. As with most Indian delicacies, there are sweet and savory versions of cheedai. 

I'm sharing a popular sweet version of cheedai today. It is a simple preparation with jaggery syrup sweetening rice flour and black gram flour. Some toasted sesame seeds, coconut and cardamom season the cheedais with crunch and flavor. 

Cheedais have a notorious reputation for bursting when frying in hot oil. It has led to many unfortunate accidents. However, sweet cheedais are less prone to bursting than its savory counterpart. So, if you are attempting this for the first time, be a little cautious and step slightly away from the oil, keeping your face and limbs at a safe distance when the cheedais are frying. But, don't fret much. If an accident-prone clumsy person like me can make this cheedai safely, so can you!


Wednesday, August 6, 2014

Aloo Bonda / Batata Vada

When it comes to indulging my husband with food, potatoes feature prominently and repeatedly in the list. I am sure it tops everyone's list! So, there's been a potato fest at our home recently. 

If there's potatoes and a fest, it has to involve something deep-fried. And one of the most popular Indian street-foods that calls for deep frying spicy potatoes has to be aloo bonda, or known as batata vada in Mumbai. How can a food that calls for deep frying spicy balls of potatoes dipped in a thick and tasty batter not be popular on any planet (involving humans)?

Making these vadas at home brings in the pungent and nostalgic smell of hot oil meeting batter and potatoes - an inescapable aroma that's sure to assault your senses if you take a walk down a busy Indian street that clamors with food, lights, colors, sound, and chatter.

Thursday, July 10, 2014

Eggless Lemon & Lime Cookies with Palm Sugar

I love a certain brand of lemon cookies that are handed out in specific airlines. Needless to say, my husband is also a big fan of citrus based desserts and sweets. So, this is actually long overdue.

I have been trying to bake with sugar substitutes like splenda or truvia, so that everyone can enjoy the baked treats. But, it's been a challenge to use these substitutes and get an end-product that is satisfying and not a complete compromise. My mom had been asking me about the availability of palm sugar here, and I was clueless. A quick visit to the organic section of our grocery store revealed the presence of several brands of palm sugar (coconut palm sugar), so I picked up a packet. And what a wonderful discovery! Palm sugar tastes wonderful - it is slightly less sweeter than regular white sugar, but with amazing smokey caramel undertones. I also read that palm sugar can be comfortably substituted for white sugar (measure to measure) while baking. So, I used palm sugar to bake these cookies and they turned out fantastic, probably even better than regular sugar!


Palm sugar is called pana vellam (in Tamil) and is commonly available and used in India and rest of Asia. It has a low glycemic index (that is, it doesn't cause blood sugar spikes) and is rich in nutrients, so it is ideal for both people with diabetes as well as those that are trying to cut down on white sugar. Yes, it is definitely more expensive than regular sugar (outside of India/Asia, at least), so it's not economical to splurge on desserts with palm sugar alone. But, for special occasions, everyone can enjoy desserts made with palm sugar without much guilt.

These cookies are so lemony and chewy and fragrant, they are refreshing and yummy! Plus, because of the addition of palm sugar, the cookies have a slight caramel flavor and they are chewy and soft. And of course, they are not too sweet, so one can munch on a few too many without realizing how many have gone in! Palm sugar is similar to brown sugar in that, while used in baking cookies, they make the cookies soft and chewy. White sugar makes the cookies crisp. So, a mix of brown and white sugars ensures a chewy middle and crisp exterior, like Nestle Tollhouse cookies!

Anyway, I think my excitement at finding a good white-sugar alternative is palpable! I will stop now and go onto the recipe.


Monday, June 16, 2014

Thenkuzhal

Thenkuzhal (also colloquially called "thengozhal") is yet another popular Indian savory. It is commonly prepared during festive occasions such as Deepavali, weddings etc. But it is also just as commonly prepared as a tea-time snack. A simple mixture of rice flour and black gram flour are mixed to form a dough with butter, salt, and cumin. This dough is squeezed through a thenkuzhal press to make strands of interconnected spiral-looking crispy treats. 

Two years ago, I made mullu thenkuzhal (a slight variation of regular thenkuzhal) for Deepavali. Now, with my mom around, we are getting to eat this treat as an afternoon nibble. 


Friday, June 13, 2014

Masala Pori / Spicy Puffed Rice Salad

This is a quick evening snack that is very very close to the popular Bhel Puri. The only thing that is missing in this snack is some crispy Sev (oma podi), and probably some boiled potatoes. Bhel puri is also served with two condiments - a sweet date-based chutney and a spicy coriander-chilli chutney. 

This dish is almost like a salad. It is healthy, extremely easy to put together when there is company and people are hungry, and not to mention - its yummy!

This version of pori is popular in South-India, especially in our Marina Beach! To make it more authentic, add some chopped raw mango to the snack. 


Wednesday, May 28, 2014

Ribbon (Savory Indian Snack)

Ribbon is a savory, deep-fried Indian snack made from rice flour and other flours that come from different Indian pulses. A dough is made from all the flours, and as the name indicates, it is pressed into thin ribbons that are deep fried. 

My parents are visiting, so we are lavished with good food and attention! My mom made this as an afternoon snack last week, and I hovered around her, recording the recipe. This recipe comes from my mother's aunt - an excellent cook who lovingly sent us a package of this savory from India, and it disappeared in no time!

So, here's the recipe. The proportion of flours used are: 3 parts rice flour, 3/4 part besan (kadala maavu/ bengal gram flour), 1/2 part moong dal flour (payatham paruppu maavu / yellow moong flour), 1/4 part pottu kadalai maavu (roasted gram flour). 

The above results in a big batch of ribbons, so my mother made a smaller batch using the above proportion as a guide. So here are the quantities of ingredients based on the smaller batch.

Friday, April 11, 2014

Mysore Bonda / Ulundu Bonda

Bondas are flavorful, deep fried fritters. Mysore bondas are popular for their distinct flavor and inviting rotund shape. Many prepare bondas with all-purpose flour (maida) and a little rice flour mixed with yogurt or buttermilk to make a fluffy batter that rises and puffs when fried. The addition of baking soda makes the bondas all the more round and puffy!

In contrast, this is another version that is prepared with black gram (ulundu). It is very similar to making medhu vadai, except this bonda is tempered with several seasonings.

When my husband heard that his mom recently made these bondas, he couldn't get them out of his mind :). So, here they are!

Thursday, March 27, 2014

Avocado & Radish Mini Tartines

Our friends TK and Sindhu gave me this wonderful book by Clotilde Dusoulier as a gift. Right after the book was published, it was on my Amazon wishlist. So it was a delightful coincidence when I received it as a gift! Thanks to them for knowing me so well :). 

I've been trying out the recipes in the book, and they are all fantastic. The recipes defy the common notions and misunderstandings surrounding French cuisine. None of the recipes are high-brow or daunting. The book is a collection of healthy recipes based on fresh seasonal produce, and they are all accessible and easy to prepare. It's yet another testament to how simple ingredients and tasteful, minimalistic seasonings pair together to make amazingly delicious dishes. Although there are some ingredients that are perhaps a little hard to find in common stores, Clotilde makes sure to suggest substitutions and alternatives. 

Anyway, when my friends visited last week, I decided to make a three course simple meal from the book.

Starting with this appetizer, I adapted the recipe from the book, and thanks to TK's feedback and suggestions, it was improvised further for an addictive and incredibly easy finger food! 


Saturday, March 15, 2014

Mini Cumin Butter Cookies / Jeera Butter Biscuits

Jeera biscuits/cookies (we call cookies as biscuits in India) are one of my husband's favorite savory items. Every so often, he hankers for them, and requests that I make some. Last weekend was one of those days when he craved for them. Thankfully, they are very easy to make and takes just 30 minutes of total work. 

I use two basic methods to make these cookies. The most frequently used recipe is this one (with cumin seeds instead of oregano), and the other commonly used is this one (with lots of cumin!). This time I borrowed elements from both recipes and decided to add more butter (sinful!) for the buttery aroma reminiscent of the melt-in-your-mouth powdery soft butter biscuits we get in Indian bakeries!

Also, this time I used a 1" (I think it's 1", but could be slightly smaller or larger) fluted round cookie cutter to make cookies that look like clouds of puffed buttery, cumin-y, golden-brown crunchiness! Anything that is a mini/baby version of anything is cute by default, right?!


Thursday, February 13, 2014

Baked Kale Chips

Kale chips have become really popular in both the health-conscious and fine-dining circuits. It's very rare for something to find a place amongst both those exclusive communities! Take one crunchy, crispy bite, and you will stop wondering what makes these chips special. No one will believe the almost magical transformation that kale undergoes when baked low and slow with a drizzle of olive oil and a sprinkle of spices.  It's as sweet a transformation as a frog turning into a prince. Even sworn haters of kale have been turned around and placated by this addictive snack.


This is hardly a "recipe". But here's the general procedure: Wash and dry one bunch of Kale. Dry the leaves well, else they will not crisp. Remove stems and ribs and tear/cut the leaves into chunks. Place on a baking sheet. Drizzle 1.5-2 tablespoons olive oil, sprinkle some salt (1/8-1/4 teaspoon), black-pepper (1/4 teaspoon) and chaat masala (about 1/4 teaspoon). Massage salt and spices into the kale leaves. Bake for 25-30 minutes until crispy in a 275 F preheated oven. Flip the leaves about half way, if you would like. I normally don't turn the leaves, and they turn out fine. I also don't like to completely char the leaves... I like to see some green, but if you want the leaves to be super roasted, bake for longer.

Crunch away!


Monday, February 3, 2014

Pan-Fried Samosas

No Indian party is complete without samosas. It is a staple in almost every fun gathering. Crunchy, buttery pockets of pastry hold a delicately spiced stuffing of potatoes and peas. The soft stuffing perfectly complements the crispy shell.

Obviously, deep frying is the best method of preparing samosas. Nothing beats it. However, in the interest of making them less oily, I have pan fried them. In the past, I have tried baking the samosas instead of pan frying, but they didn't come out well. The samosas didn't cook evenly and the shell was hard. So, pan frying is the second best option. 

And, of course, this is just my version of making samosas - mini samosas. The original version of folding the dough to make the pockets to hold the stuffing is different from my "short cut" version. But, this is a decent short-cut. If you prefer, please deep fry and enjoy a better tasting samosa!


The steps (makes about 15-16 samosas, depending on the size of the samosas)

The dough:
  1. 1.5 cups maida / all purpose flour
  2. 1.5 tablespoons ghee / clarified butter (or use butter)
  3. 1/2 cup buttermilk / diluted yogurt
  4. 1 teaspoon salt or as needed
In a wide bowl, mix salt and all-purpose flour. Add ghee and mix it in. Slowly add the buttermilk / diluted yogurt and knead the dough until it comes together as a soft and pliable mass. If needed, sprinkle a little water. I usually add buttermilk/yogurt/whey to make rotis and I find a distinct difference in how soft the rotis turn out. Since the samosas are not deep fried, it is important that they turn out soft and not hard and brittle while pan frying. And yogurt comes to the rescue to ensure the samosas are soft. If you prefer, add 1/4 cup water and 1/4 cup yogurt/buttermilk. Cover the prepared dough with a damp cloth and let it rest for 15-20 minutes.

the prepared dough


The filling (some filling - up to 1/2 cup will be left over):
  1. 2 potatoes, boiled, peeled, and crumbled 
  2. 1 onion, sliced
  3. 2 tablespoons oil
  4. 1/2 teaspoon black mustard seeds
  5. 1/2 teaspoon jeera / cumin seeds
  6. 2 green chillies, chopped
  7. 3 cloves of garlic, minced
  8. 1 teaspoon minced ginger
  9. 1/2 teaspoon turmeric powder
  10. 1.5 teaspoons garam masala / vegetable sabzi masala 
  11. 1/3 cup peas (thawed, if using frozen)
  12. 1 teaspoon salt
  13. 2 teaspoons dried mint leaves (optional)
  14. 1 teaspoon of lemon juice
  15. 1/4 cup coriander leaves / cilantro
Preparing the filling:
  1. Heat oil in a pan. When hot, splutter mustard seeds, and add jeera. When jeera begins to sizzle, add ginger, green chillies, and onion and saute until onion begins to brown slightly. 
  2. Add garlic and fry for 1 minute. 
  3. Add turmeric powder and mix
  4. Add the crumbled potatoes and mix them well. Fry for 5 minutes. 
  5. Add garam masala and peas and give a mix
  6. When peas are cooked, remove from heat.
  7. Throw in dried mint leaves, coriander leaves and lemon juice and mix. Let filling cool.
 Making the samosas:
  1. Pinch out and make about 7-8 balls from the prepared dough. Cover the balls/dough with a damp cloth or paper towel, so that they remain soft and don't form a crust. 
  2. Roll out each ball into an evenly thin circle, so that the samosa cooks evenly (dust the rolling board/pin with all-purpose flour to avoid the dough from sticking). Cut the circle in the middle to make two semi-circles. 
  3. Gently roll each semicircle along the curve to connect either sides and make a wide conical shape (just as you would roll a piece of paper to make a cone). Use water to seal the edges. Fill the pocket/the "cone" with the stuffing. Gently push the stuffing to the bottom using your finger and continue filling until the top. Then fold down the "flap" at the top to cover the filling. Use water to seal the flap. Hopefully the pictures below help visualize the process. If you don't want to go through all the trouble to make these pockets, just place the filling in the corner of a small circle of rolled out dough and close to make a crescent. Otherwise, cut out squares of the rolled out dough, place filling on one side, and connect the diagonals to form triangles. My samosas are anyway distant cousins to triangles and cones, so the shapes don't really matter! Just stuff any which way and fry!
Once all the "samosas" are stuffed, pan fry them. Cover all the prepared stuffed samosas with a damp cloth. For each batch, use about a teaspoon of oil in a pan and fry the samosas on both sides until golden brown. 

Things to keep in mind while frying:
1. First heat the oil on medium heat. When hot, start frying the samosas. Soon the pan would get too hot, causing the outside of the samosas to crisp up fast, leaving the insides of the dough raw. So, reduce the heat slightly in about 10 minutes time to ensure the samosas cook through and crisp up.
2. Gently press down on the samosas to help all the edges fry and cook evenly. Otherwise, the center of the samosas will brown and crisp, while the edges wouldn't even touch the pan and will remain raw.


Serve hot with ketchup or spicy mint-coriander chutney.

Sunday, February 2, 2014

Baked Sweet Potato Fries

Superbowl finger food this time - Sweet Potato Fries and pan-fried Samosas! Both my husband and I LOVE sweet potato fries. We can't seem to get enough of them. They are so incredibly addictive. After a few lukewarm attempts where my fries were either too caramelized or just a little limp or lacking in flavor, I finally hit upon a combination of spices and bake time that seems to work. This version of the fries is sweet and spicy. I also added some brown sugar to bring out some extra camerlization action!

So, here it is!

Ingredients (serves 4):
  1. 2 sweet potatoes, peeled and cut into wedges about 3/4 - 1 inch wide
  2. 1.5 tablespoons corn starch
  3. 1 teaspoon salt
  4. 1 teaspoon freshly cracked black pepper
  5. 2 teaspoons brown sugar
  6. 1/2 teaspoon amchur / dry mango powder
  7. 1 teaspoon chaat masala
  8. 1.5 teaspoons cumin powder / jeera powder
  9. 1 + 2 tablespoons olive oil
Coated with spices and ready to bake!
Preparation:
  1. Preheat the oven to 425 F
  2. In a big enough zip lock bag, throw in the sweet potatoes and corn starch. Seal the bag and give it a good shake until all the wedges are coated with corn starch. This makes the fries slightly more crispier.
  3. Next, add the remaining spices - salt, pepper, brown sugar, amchur, chaat masala, and cumin powder.  Lastly pour 2 tablespoons of oil into the bag. Seal the bag and toss the wedges and massage them so that they get coated with all the spices. 
  4. When all the wedges look evenly coated, transfer them to a baking sheet and bake for 15 - 20 minutes on one side (I recommend 17 minutes :)). Now, flip the wedges onto the other side, drizzle a tablespoon of oil and bake for another 20 minutes or until the wedges are sufficiently browned/caramelized.
That's it. Remove from the oven and serve immediately.

Sunday, January 19, 2014

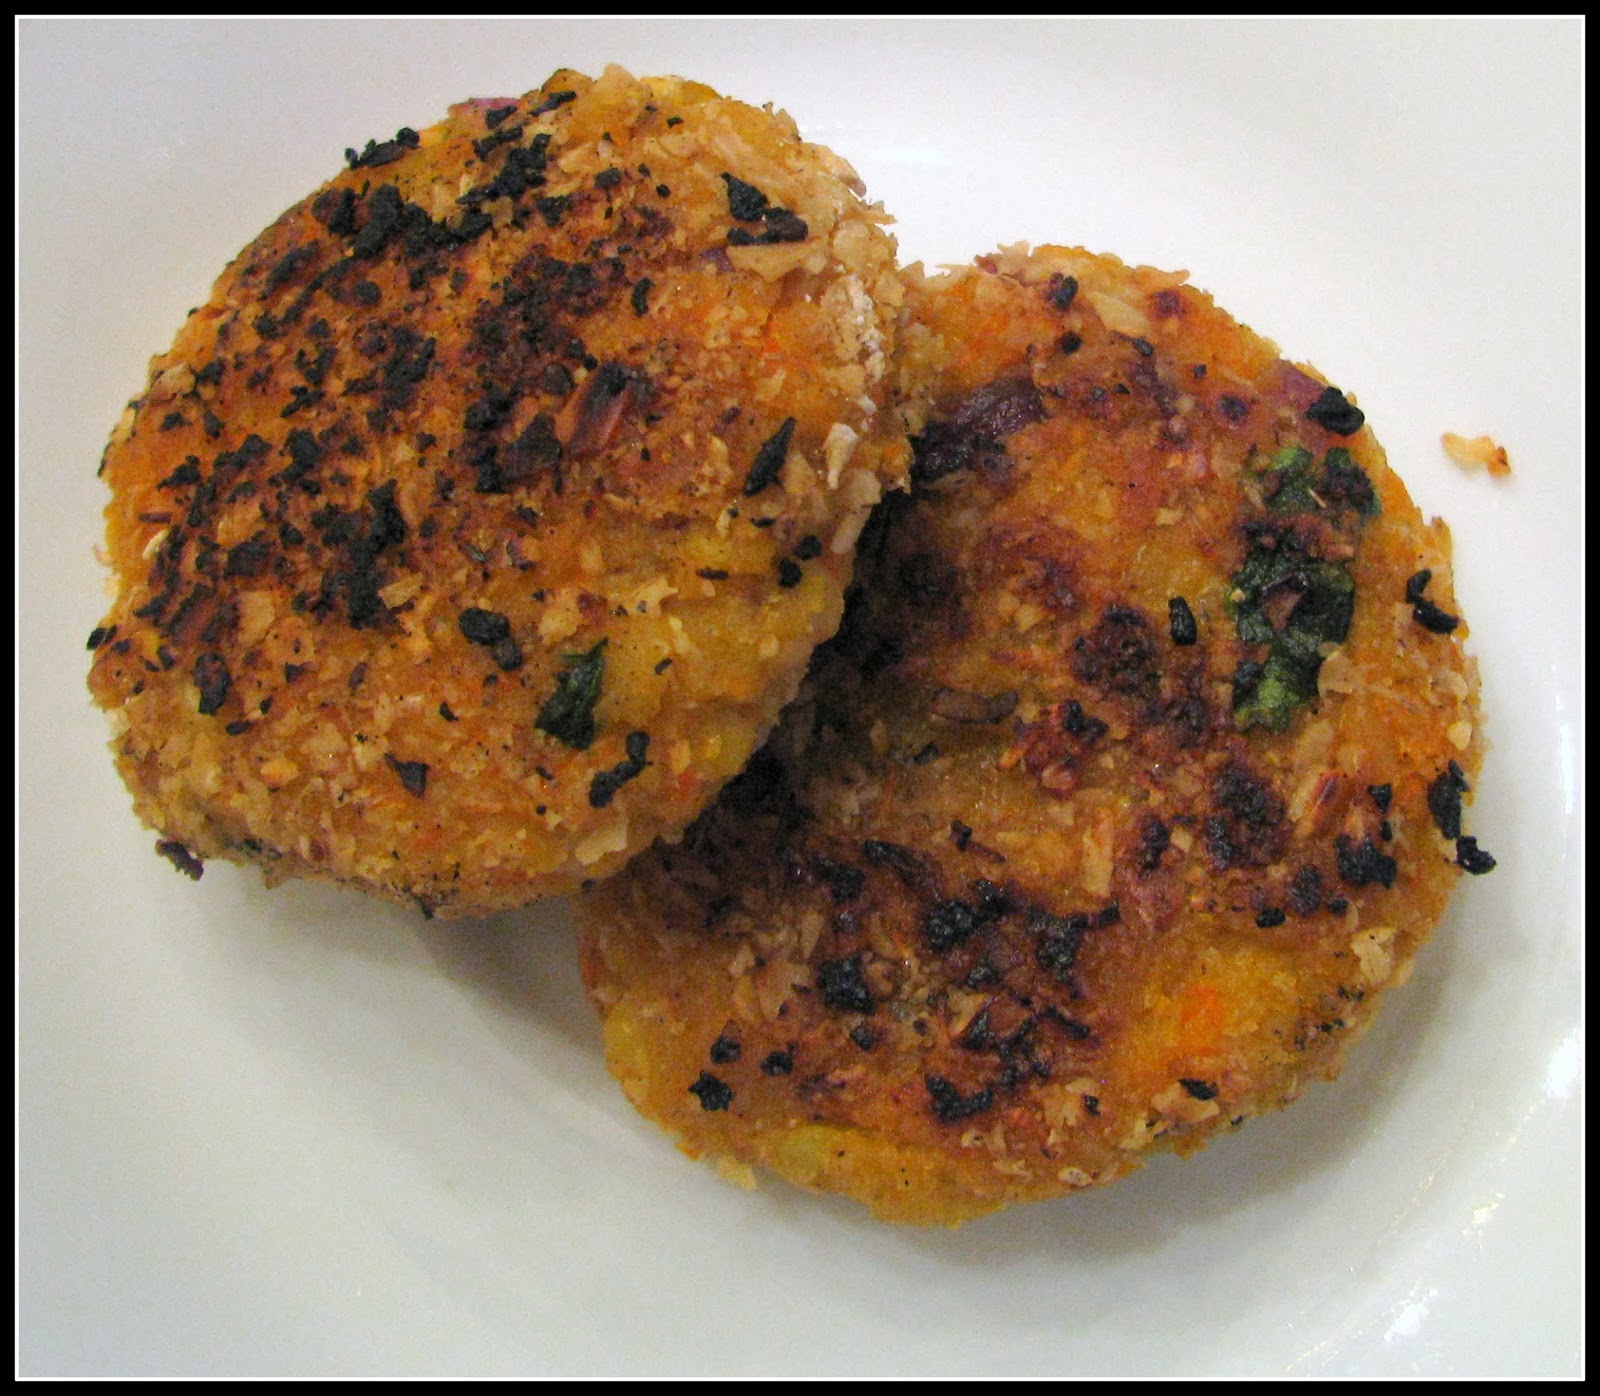
Moong Dhal Tikki / Mung Bean Tikki

Tikki or cutlets are deep-fried/pan fried spicy patties. They are popularly prepared with mashed potatoes and Indian spices and are called Aloo Tikkis. The fried potato patties are as popular as Samosas are as party and tea-time appetizers in India.

I never would have thought to make tikkis with lentils or dhal (although now that I think about it, it is like making masala burgers!), until I came across a lovely recipe that used moong dhal instead of potatoes, and oats instead of bread crumbs to crisp the tikkis. And after trying, tasting and testing the tikkis on friends, I can say that nobody could guess that the tikkis were made with plain old dhal and not potatoes! They taste really good, are healthier than potato tikkis and are perfect as an appetizer that doesn't allow guilt to creep in.


Adapted and tweaked from this recipe
Ingredients (serves 4):
  1. 1/3 cup uncooked moong dhal /payatham paruppu / yellow mung beans
  2. 1 cup oats
  3. 1/2 a medium-large red onion, finely chopped
  4. 1 teaspoon minced ginger
  5. 1 green chilly, finely chopped
  6. 1 teaspoon coriander powder
  7. 1 teaspoon garam masala or pav bhaaji masala
  8. 1/2 teaspoon turmeric powder
  9. 4 tablespoons (and a few extra teaspoons) vegetable oil, or as needed
  10. 1/4 chopped coriander leaves / cilantro
  11. 1/4 - 1/3 cup buttermilk or diluted yogurt (as needed)
  12. 1.5 teaspoons salt or as needed
Preparation:
  1. Cook the moong dhal with just enough water to complete cook the dhal until mushy. If there is any extra water, drain it from the cooked dhal and let it cool. When cool, pulse in a blender until the dhal is broken down. Do not add any water.
  2. Grind 1/2 cup of oats. Add this to the cooked & pulsed dhal along with chopped onion, ginger, green chilly, garam masala/other masala, turmeric powder, salt, and coriander leaves and mix everything well. Try to form small discs/patties that hold together. If you are unable to form patties, grind some more oats and add to the mixture until you can form patties. 
  3. Create an assembly line to pan fry the patties/tikkis. Heat a teaspoon of oil in a skillet (cast-iron ideally). Dip the patties in buttermilk/yogurt, roll it around in the remaining 1/2 cup of oats that is coarsely ground (just pulse a couple of times in the blender) and pan fry on either sides until golden brown. Replenish the skillet with oil and pan fry all the patties. Note: for most of the tikkis, I didn't need to dip in buttermilk/yogurt to coat them in coarsely ground oats. The patties were moist enough by themselves for the oats to attach to their exterior. So, dip in buttermilk/yogurt if required.
  4. Remove and drain on paper towels. Keep the fried patties in a warm oven (200 F or less) until ready to serve. 

Serve with tomato ketchup or a favorite sauce of your choice. 

Wednesday, January 15, 2014

Vegetable Manchurian

During the crazy Arctic freeze and blizzard of last week when everyone was huddled indoors, I took a break to make these manchurians. Usually, a gloomy weather is an excuse for making fried foods such as bajji and pakoda. They warm you up and make you forget the calories for a while. Since my husband had been asking for manchurians lately (and since I love them too), I decided to try and make some.

This is just my mish-mash version of machurians. Manchurians are popular in India and are hailed as Indo-Chinese delicacies. However, most Chinese people don't regard Manchurians as Chinese food. It has some soy sauce and Chinese chilli sauce in it, so perhaps that's why it's referred as Indo-Chinese. 

So what are manchurians, you might ask. They are crispy fried nuggets of vegetables (popularly cauliflower florets) that's tossed in a spicy and flavorful Asian sauce consisting of soy sauce, ginger, garlic, brown sugar, tomato sauce, chilli sauce and scallions. They make extremely addictive appetizers and finger foods. 

I added no heat to this version. No chillies, no chilli sauce, because we are not fans of heat. Plus, I didn't have any chillies or chilli sauce... and venturing out to get them in a polar blizzard didn't seem wise. So add as many chillies as you would like, if you decide to try this recipe. The manchurians were flavorful for sure and tasted quite close to the real deal.

Ingredients (serves 2):

For the manchurians (makes 14)
  1. 1 cup shredded cabbage
  2. 1 green bell-pepper, finely chopped (comes to 1 cup)
  3. 2 tablespoons besan / kadalai maavu / bengal gram dhal flour
  4. 3 tablespoon rice flour
  5. 1 teaspoon soy sauce
  6. 1 teaspoon salt or as needed
  7. 1 teaspoon pepper
  8. 1 tablespoon of equal proportion of minced garlic and ginger
  9. 1 tablespoon chopped scallions 
  10. 4-5 cups vegetable oil for deep frying
the manchurians seem really dark because I used purple cabbage
For the Sauce
  1. 2 tablespoons sesame oil
  2. 3 pods of garlic, minced
  3. 1 teaspoon minced ginger
  4. 1/4 of a medium red onion, minced
  5.  3 tablespoons tomato ketchup
  6. 1 tablespoon soy sauce
  7. 2 teaspoons vinegar / rice wine vinegar
  8. 1.5 teaspoons honey
  9. salt as needed (be wary of the soy sauce)
  10. Some coriander leaves/cilantro for garnish
Dipped in sauce
  Preparation:
  1.  In a bowl, mix the cabbage, bell pepper, ginger, garlic, scallions, salt and pepper. Add soy sauce and mix. Add besan, rice flour and all-purpose flour and mix. The addition of flour should enable you to make small fritter sized balls that hold shape and form. If you are unable to form balls, sprinkle some more besan or rice flour and try again. Adding rice flour makes the manchurians crispy. (note: I did not drain water from the vegetables, especially the cabbage)
  2. Form balls and deep fry them to golden brown. Fry them on medium heat making sure the outside doesn't fry before the insides are cooked. That is, slowly fry them to a golden brown. Drain on paper towels. 
  3. Make the sauce.
    1. Heat sesame oil and add onion and saute until they are translucent. 
    2. Add garlic and ginger and fry on medium heat for a minute or two. Remove from heat.
    3. In a bowl, whisk together - tomato ketchup, soy sauce, honey, vinger and salt (if needed). 
    4. Add the sauted onion, garlic, ginger (along with any sesame oil in the pan) to the sauce and mix well. 
  4. Now, take each manchurian and dip/roll it in the sauce and take out. After repeating this for each manchurian, pour the remaining sauce evenly on the manchurians and serve with a garnish of coriander leaves and scallions (if you have any). 
Serve immediately. You can carefully skewer each manchurian on a tooth pick and lay them out as finger food. Enjoy before the manchurians become soft!

Tuesday, December 24, 2013

Onion Rings

As part of my husband's birthday meal, I also prepared some onion rings. Onion rings are one of his favorite munchies. He'd asked me to make them on several occasions, so I finally decided to make a batch for his birthday. 

I followed Ina's trusted recipe for onion rings and they turned out great. 

They are also incredibly simple to make. Use white/yellow onions, slice the onions into rounds, marinate them in a simple batter of buttermilk, salt, and pepper, bread/coat them in a mixture of all-purpose flour and cornmeal that's seasoned with more salt and pepper. Deep fry!