Showing posts with label kozhakattai. Show all posts

Friday, September 18, 2015

Ammini Kozhakattai

There many different kinds of savory kozhakattais (rice flour based dumplings). Of the many, ammini kozhakattais are a tasty and cute variation. They are commonly prepared from left-over rice-flour dough that's used to make the traditional sweet and savory kozhakattais. The left-over dough is rolled into small balls, steamed, and flavored with different kinds of spice-mixes. I am sharing three most common ways to flavor them.

Thursday, September 17, 2015

Poricha Kozhakattai / Fried Wheat Kozhakattai

On the event of Ganesh Chathurthi, everyone back home is abuzz with celebration and preparation of treats. Modhaks/Kozhakattais mark the festive air by lending the sweet aromas of jaggery and cardamom that mingle with the perfumed smells of incense and camphor. There are so many memories of sight and smell and touch. The bursts of colors in red, yellow, green, and lavender from the flowers, the carefully adorned clay idols, the crinkly paper umbrella stuck at the back, the prickly sprigs of wheat grass, the scatter of platters of freshly made kozkattais, vadai and paayasam, the tinkle of prayer bells chiming from the neighbors - are just some of the memories. 

Instead of the traditional kozhakattais made with rice flour, I present another common version prepared with wheat flour. It is much more straightforward, involves lesser time, and turns out really tasty (and yes, it is deep-fried! :)). But invoking the name of Ganesha, set aside that little bit of information :).

My mom often prepares this version, so it also happens to trigger more special memories for me.


Friday, December 27, 2013

Milk Kozhukattai

For Ganesh Chathurthi this year, I made paal kozhakattai... an easier, simpler version of the original sweet Kozhakattai

I followed this recipe to make the kozhakattai and they came out quite well. It incorporates all the ingredients that go into the poornam kozhakattai, but it is a short cut to make my life easier :)


Tuesday, January 15, 2013

Savory Pudi Kozhakattai

Here is the recipe for the savory version of pudi kozhakattai that's made by steaming rice dumplings made from ground rice cooked in an assortment of South-Indian spices and pulses. The recipe for the sweet version of this dish is here.


Ingredients (serves 4):
  1. 1 cup raw white rice
  2. 2 tablespoons sesame oil
  3. 1 teaspoon black mustard seeds
  4. 2 teaspoons split urad dhal / black gram / ulutham paruppu
  5. ¼ teaspoon hing / asafoetida
  6. 2-3 dry red chillies
  7. 2 tablespoons shredded coconut
  8. 1 teaspoon salt (or as needed)

Preparation:
  1. Grind the rice in a blender until it is ground to the consistency of semolina (rava) or cornmeal.
  2. Heat a tablespoon of sesame oil in a medium sauce-pan. When hot, splutter the mustard seeds, add split urad dhal, hing, and red chillies.
  3. To the seasoning above, add 3 cups of water (as needed, depending on the particular type of rice) and bring it to a boil.
  4. To the boiling water, add salt, coconut, and slowly add the rice. Stir continuously to avoid forming lumps. Keep stirring on medium heat until the rice cooks and comes together as a moist, soft lump of dough.
  5. Remove from heat and keep it aside to cool.
  6. When cool, pinch out small quantities of the cooked, mushy rice and make oblong dumplings. On medium-high heat, steam the dumplings (kozhakattais) in a vegetable steamer or idli plates greased with some sesame oil, for 15 minutes until the kozhakattais are completely cooked (until a tooth-pick inserted in the middle of the dumplings comes out clean).

When cool, serve with any spicy side-dish or yogurt.

Monday, January 14, 2013

Sweet Pudi Kozhakattai

Kozkakattais are festive Indian dumplings. The traditional and most common ones have some sweet or savory filling stuffed inside soft rice dough, and the whole thing is steamed. These traditional dumplings are much more labor-intensive to prepare for the average home-cook who battles with time to get a meal on the table. For such of us, these pudi kozhakattais are a nice variation! Rather than troubling yourself with stuffing the rice dough with a filling, you knead the cooked rice with the filling (sweet or savory) and steam. These dumplings taste just as good (if not better)!


My mom often prepares these, and so do my in-laws.

Ingredients: (Serves 4)
  1. 1 cup raw white rice
  2. 2 tablespoons shredded coconut
  3. ½ teaspoon freshly ground cardamom
  4. 1 - 1.5 cups crumbled jaggery or brown sugar (depending on how sweet you would like it)
  5. few teaspoons sesame oil


Preparation:
  1. Grind the rice in a blender until it is ground to the consistency of semolina (rava) or regular sand (as shown above).
  2. Bring 4.5-5 cups of water (or more, depending on the type of rice you are using) to a boil in a medium sauce-pan. When the water boils, add the ground rice and stir constantly on medium or low-medium heat until the rice cooks and comes together as a moist dough. Add more water if required, if the rice doesn’t cook.
  3. When the rice is cooked, add the powdered jaggery or brown sugar and coconut, and stir well on low-medium heat. The jaggery/sugar will melt in the heat. Keep stirring to incorporate the jaggery/sugar into the cooked rice. Stir until the the whole thing comes together as a soft, moist lump of dough (as shown in the picture).
  4. Remove from heat, add cardamom and stir. Let the cooked sweetened rice cool.
  5. When cool, pinch out small quantities of the cooked, mushy rice and make oblong shaped dumplings. On medium-high heat, steam the dumplings (kozhakattais) in a vegetable steamer or idli plates greased with some sesame oil, for 15 minutes until the kozhakattais are completely cooked (until a tooth-pick inserted in the middle of the dumplings come out clean).

Serve hot or at room temperature.

Tuesday, September 20, 2011

Poornam Kozhakattai - revisited

This post should have come out way sooner. But in any case, I reattempted poornam kozhakattai this time and I’m glad to report that the consistency of the poornam turned out just right! It’s way easier than all the fuss I needlessly went through the last time. (Remember, my poornam stuffing turned out a little hard?)
 
Copy pasting the steps from the earlier post, I will just edit the parts that worked this time (in blue font).

Preparing the coconut-jaggery filling (poornam) (You need: ¾ cup of powdered jaggery, 1 cup of coconut gratings, and 1 teaspoon of powdered cardamom)

1. Add a teaspoon of water to a heavy bottom pan (or a not so heavy-bottomed pan - doesn’t matter much). Not necessary
2. Powder jaggery into little bits. In the US, it’s a lot of work to powder the balls of hard, stone-like  jaggery. A trick I use is - stick the jaggery into the microwave for about 30 secs (or more depending on the amount of jaggery), and crumble the heated, loosened jaggery with your fingers. Caution: Do not over heat, or you will end up with a melted puddle of jaggery.
3. Add ¾ cup of powdered jaggery into the pan, and stir till it melts and begins to froth up in little bubbles (Note: Stir the jaggery on sim, or medium heat). The bubbles need not be vigorous. Once you notice the bubbles, switch the heat to low.
4. At this point, add 1 cup worth of grated coconut (I approximated here, for the cookbook says the gratings of 1 big coconut - I had no inclination to hunt for a big coconut, crack it open, and grate it).
5. Continue stirring the mixture on low heat (on a heat-scale of 0-10, my heat was at 2), for exactly 6-7 minutes, till the mixture is almost sticky without much liquid. Remember the poornam will harden and set as it cools. 
6. Remove from heat, and add one teaspoon (or more) of powdered cardamom.  Allow it to cool. The cooled filling should be a soft, non-runny mass of jaggery and coconut. It shouldn’t be runny or hard. 

And viola! You end up with nice, soft, yummy poornam :)

Tuesday, September 13, 2011

Ulutham Kozhakattai / Uppu Kozhakattai Savory Kozhakattai

I tried my hand at Kozhakattai making again. And it felt good to be progressing at something, albeit slowly. I’m still taking my baby steps in these culinary-marathons. So there’s more time and work ahead of me!

One of the most popular kinds of savory kozhakattai has a stuffing made of cooked and sauteed urad dhal paste. This is the kozhakattai that features on Ganesh Chathurthi along with its sweet brother - the poornam kozhakattai. So, following Meenakshi ammal’s recipe, my mom’s recipe, and hazy recollections of how it was made, I tried out the delicious savory dumpling this time. 

Ingredients for the stuffing (yield: 15 kozhakattais)
  1. ½ cup of de-husked whole urad dhal / ulundu / black gram
  2. 1 teaspoon of bengal gram dhal
  3. ¼ teaspoon of Hing
  4. ½ teaspoon of Salt (or more depending on your taste)
  5. 2-3 green chillies, finely cut.
  6. 1 teaspoon of black mustard seeds
  7. 1 tablespoon of sesame oil
Preparing the rice-flour dough - the same method as making the sweet version (You need: 1 cup of water, 1 cup of rice flour,  a teaspoon of salt and sesame oil)
  1. Boil 1 cup of water with a teaspoon of gingely (sesame) oil and a teaspoon of salt.
  2. When the water comes to a boil, add 1 cup of finely ground rice flour (note the easy 1:1 proportion)
  3. As you add the rice-flour, start stirring the mixture continuously to avoid forming lumps.
  4. Keep stirring (for about 4-5 minutes) till the mixture comes together as a nice lump of dough. (Note: I switched off the heat within 2 minutes or so and continued stirring in the remaining heat. If you find the dough to be sticking to the bottom of the vessel, remove the pan from heat). This step requires a strong arm, so employ a male member of the household if your arms tire.
  5. Once the dough comes together looking “glossy” (meaning the flour is reasonably cooked), transfer it onto a wet piece of cloth (any thin cotton cloth works fine.. just ensure the dye on the cloth does not run and stick to the dough. It’s safest to go with a white cloth). Wrap the dough in the cloth into a tight ball, so it continues to remain moist. The dough cracks if it becomes dry.
  6. Let it become cool to the touch. Then gently knead and re-wrap in the cloth.
Preparing the Stuffing
  1. Soak the urad dhal and bengal gram dhal for one hour in water.
  2. Drain the water and grind the soaked dhals to a smooth paste sprinkling water every now and then
  3. The next step is to cook the ground dhal paste. Steam the paste as you would steam rice. Since the paste tends to stick to the bottom of the vessel in which you cook/steam, line it with some aluminum foil (back in the day, banana leaves were used). Also pick a vessel that is wide (a plate is best, but difficult to steam), so that the paste cooks evenly and faster. I steamed the paste for 20 minutes on high heat until a tester came out clean. 
  4. Let the cooked dhal paste cool. Crumble the cooled mass into little bits.
  5. Heat some oil in a pan. Temper the oil with mustard seeds. Once it splutters, add the cut green chillies and hing.
  6. Next add the crumbled dhal mixture and saute. Add some salt and keep stirring the mixture till it becomes fluffy and begins to crisp just a little. Do not let it brown. Switch off the heat once it nears this state (takes about 10-15 minutes of sauteing on medium heat).
The stuffing is now ready. 
 

Putting the two together
  1. Pinch out some prepared rice dough and flatten the ball between your fingers, as if you were making a bowl (recall your days of playing with clay and play doh). Keep a cup of sesame oil nearby, and dip your fingers in the oil to avoid them from sticking to the dough and tearing the bowl/pocket you are creating.
  2. Place a teaspoon (more or less) of the cooled savory filling into the pocket, and seal the edges by pressing the sides together. The end result should look like a sea shell.
  3. Grease idli plates with some sesame oil, and place the stuffed kozhakattais on them. Two per plate if they are small. If you don’t have idli plates, you can devise your own steamer. You can use a vegetable steamer etc.
  4. Bring some water to a boil in a tall, deep vessel (the ones used to cook pasta). Place the idli plates inside it, and make sure the water doesn’t touch or come above the bottom-most idli plate... if that’s case, your bottom kozhakattais will turn out soupy.
  5. Close the pan (with a lid that has a vent for allowing the steam to escape) and cook on high heat for 12-15 minutes.
  6. If the kozhakattai’s color is changed from pale white to a creamy beige and it looks soft, it is cooked! Transfer onto a plate and eat away.

 In common parlance, this is also called as Uppu Kozhakattai (Salt Kozhakattai), and it is my personal favorite compared to the sweet one!

Thursday, June 30, 2011

Poornam Kozhakattai

I thought I’d try and be an ideal Iyer-maami for once and start with a dish that is offered to Lord Ganesha. In the Hindu (Iyer) tradition, Ganesha is regarded as the remover of all obstacles, so it’s customary for us to start anything by worshiping Him and invoking His blessings. So here are my symbolic offerings through my experience of making Kozhakattai! I know my mom will be proud of at least this act of mine. 
Every year, on Ganesh Chathurthi (Lord Ganesha’s birthday), the primary celebratory item on the menu is Kozhakattai (Modhakam). It is rumored that this is Ganesha’s favorite dish. Broadly, there are two varieties of this rice dumpling - sweet and savory. In almost every festival, we try to have a combination of both sweet and savory dishes to balance out the palate, and to symbolically portray the balance and contrast our Life offers. The sweet version (the most common version) has a scrumptious filling of coconut and melted jaggery (known as poornam). This filling is stuffed into cute pockets of rice-flour balls, and then steamed to perfection. Sounds easy, doesn’t it? :). Yeah, so I thought too.

As an adolescent and teenager, my designated “job” during Chathurthis was to pinch out the rice balls, make nimble pockets with my fingers, stuff the filling and neatly fold the corners to make a purse. If I may say so, I was quite good at making the “purses”. My mom and great aunt were much pleased that I could put this skill down on my matrimonial-resume ;). So again, I thought - how hard can this be? Until the day I made my own, I didn’t realize the precision and skill required to make the perfect consistency of rice-flour dough and the jaggery-coconut filling. Therein, is the real skill.

Preparing the rice-flour dough (You need: 1 cup of water, 1 cup of rice flour,  a teaspoon of salt and sesame oil)
Armed with Meenakshi ammal’s book and measurements, I set out to make the rice-flour dough. I have to say that this step is easy-peasy.
1. Boil 1 cup of water with a teaspoon of gingely (sesame) oil and a teaspoon of salt.
2. When the water comes to a boil, add 1 cup of finely ground rice flour (note the easy 1:1 proportion)
3. As you add the rice-flour, start stirring the mixture continuously to avoid forming lumps.
4. Keep stirring (for about 4-5 minutes) till the mixture comes together as a nice lump of dough. (Note: I switched off the heat within 2 minutes or so and continued stirring in the remaining heat. If you find the dough to be sticking to the bottom of the vessel, remove the pan from heat). This step requires a strong arm, so employ a male member of the household if your arms tire.
5. Once the dough comes together looking “glossy” (meaning the flour is reasonably cooked), transfer it onto a wet piece of cloth (any thin cotton cloth works fine.. just ensure the dye on the cloth does not run and stick to the dough. It’s safest to go with a white cloth). Wrap the dough into a tight ball in the cloth, so it continues to remain moist. The dough cracks if it becomes dry.
6. Let it cool a bit. Gently knead the dough when it is slightly cool and ready to be made into balls. But keep it covered in the moist cloth.

Preparing the coconut-jaggery filling (poornam) (You need: ¾ cup of powdered jaggery, 1 cup of coconut gratings, and 1 teaspoon of powdered cardamom). My re-attempt of poornam making is here.
1. Add a teaspoon of water to a heavy bottom pan (or a not so heavy-bottomed pan - doesn’t matter much).
2. Powder Jaggery into little bits. In the US, it’s a lot of work to powder the balls of hard, stone-like  jaggery. A trick I use is - stick the jaggery into the microwave for about 30 secs (or more depending on the amount of jaggery), and crumble the heated, loosened jaggery with your fingers. Caution: Do not over heat, or you will end up with a melted puddle of jaggery.
3. Add ¾ cup of powdered jaggery into the pan, and stir till it melts and begins to froth up in little bubbles (Note: Stir the jaggery on sim, or medium heat)
4. At this point, add 1 cup worth of grated coconut (I approximated here, for the cookbook says the gratings of 1 big coconut - I had no inclination for hunting a big coconut, cracking it open, and grating it).
5. Continue stirring the mixture on sim/low heat, till the mixture becomes “sticky” and devoid of liquid (for 6-7 minutes)
6. Remove from heat, and add one teaspoon (or more) of powdered cardamom.  Allow it to cool. The cooled filling should be a sticky, gooey mixture of jaggery and coconut. It shouldn’t be runny or hard -must be just right.

Putting the two together
1. Once the rice-flour dough is cooled, take a little ball and pinch and flatten the ball between your fingers, as if you were making a bowl (recall your days of playing with clay and play doh). Keep a cup of sesame oil nearby, and dip your fingers in the oil to avoid them from sticking to the dough and tearing the bowl/pocket you are creating.
2. Place a teaspoon (more or less) of the cooled poornam filling into the pocket, and seal the edges by bringing them up into a knot, and press them. The end result should like a draw-string purse.
3. Grease idli plates with some sesame oil, and place the stuffed kozhakattais on them. Two per plate if they are small-medium sized. If you don’t have idli plates, you can devise your own steamer. You can use a vegetable steamer etc.
4. Bring some water to a boil in a tall, deep vessel (the ones used to cook pasta). Place the idli plates inside it, and make sure the water doesn’t touch or come above the bottom-most idli plate... if that’s case, your bottom kozhakattais will turn out soupy.
5. Close the pan (with a lid that has a vent for allowing the steam to escape) and cook on high heat for 10-11 minutes.
6. If the kozhakattai’s color is changed from pale white to a creamy beige and it looks soft, and the filling oozes through here and there, then you know it is cooked! Transfer onto a plate and eat away.

Lessons learned from past mistakes:
I realize I need more “visuals” to demonstrate the making, filling and sealing of the kozhakattai. Will take more helpful pictures the next time around!

Let me bring your attention to point number 5 of the filling preparation stage (the step highlighted in red). This is a tricky step, the most crucial step that decides whether your filling will be runny and spoil the kozhakattai by making it sloppy and goopy, or if your filling will turn into a hard candy, making the kozhakattais inedible.The proof is in the stuffing, indeed. Unfortunately, Meenakshi ammal doesn’t provide a concrete clue for us novices to know when to remove the filling from the heat. In my case, I kept stirring the mixture because I wanted a liquid-less state (as the book suggests), but somewhere I went too far (despite not reaching the liquid-less state). I realized that I shouldn’t be heating the jaggery for too long as it would turn into candy, so I removed it when this fear crept in. However, it was a bit too late. The jaggery was just past the right consistency. My poornam filling was chewy - it was thankfully not hard, but regretfully not soft and gooey either. When I asked my mom and mom-in-law to solve this for me, both couldn’t verbalize the exact clues to look for, to check if the filling was ready. It is an intuitive feeling, they say. But I haven’t reached that stage of intuitive cooking yet. So I will continue to explore, and hopefully offer some tips on the exact time to stir, the heat at which to stir, and the consistency to look for to get that perfect yummy texture. If you have words of wisdom to offer, please do!

(Update: the poornam turned out right in my second attempt. All it takes is to stir the jaggery+ coconut mixture for exactly 6-7 minutes on low heat.).

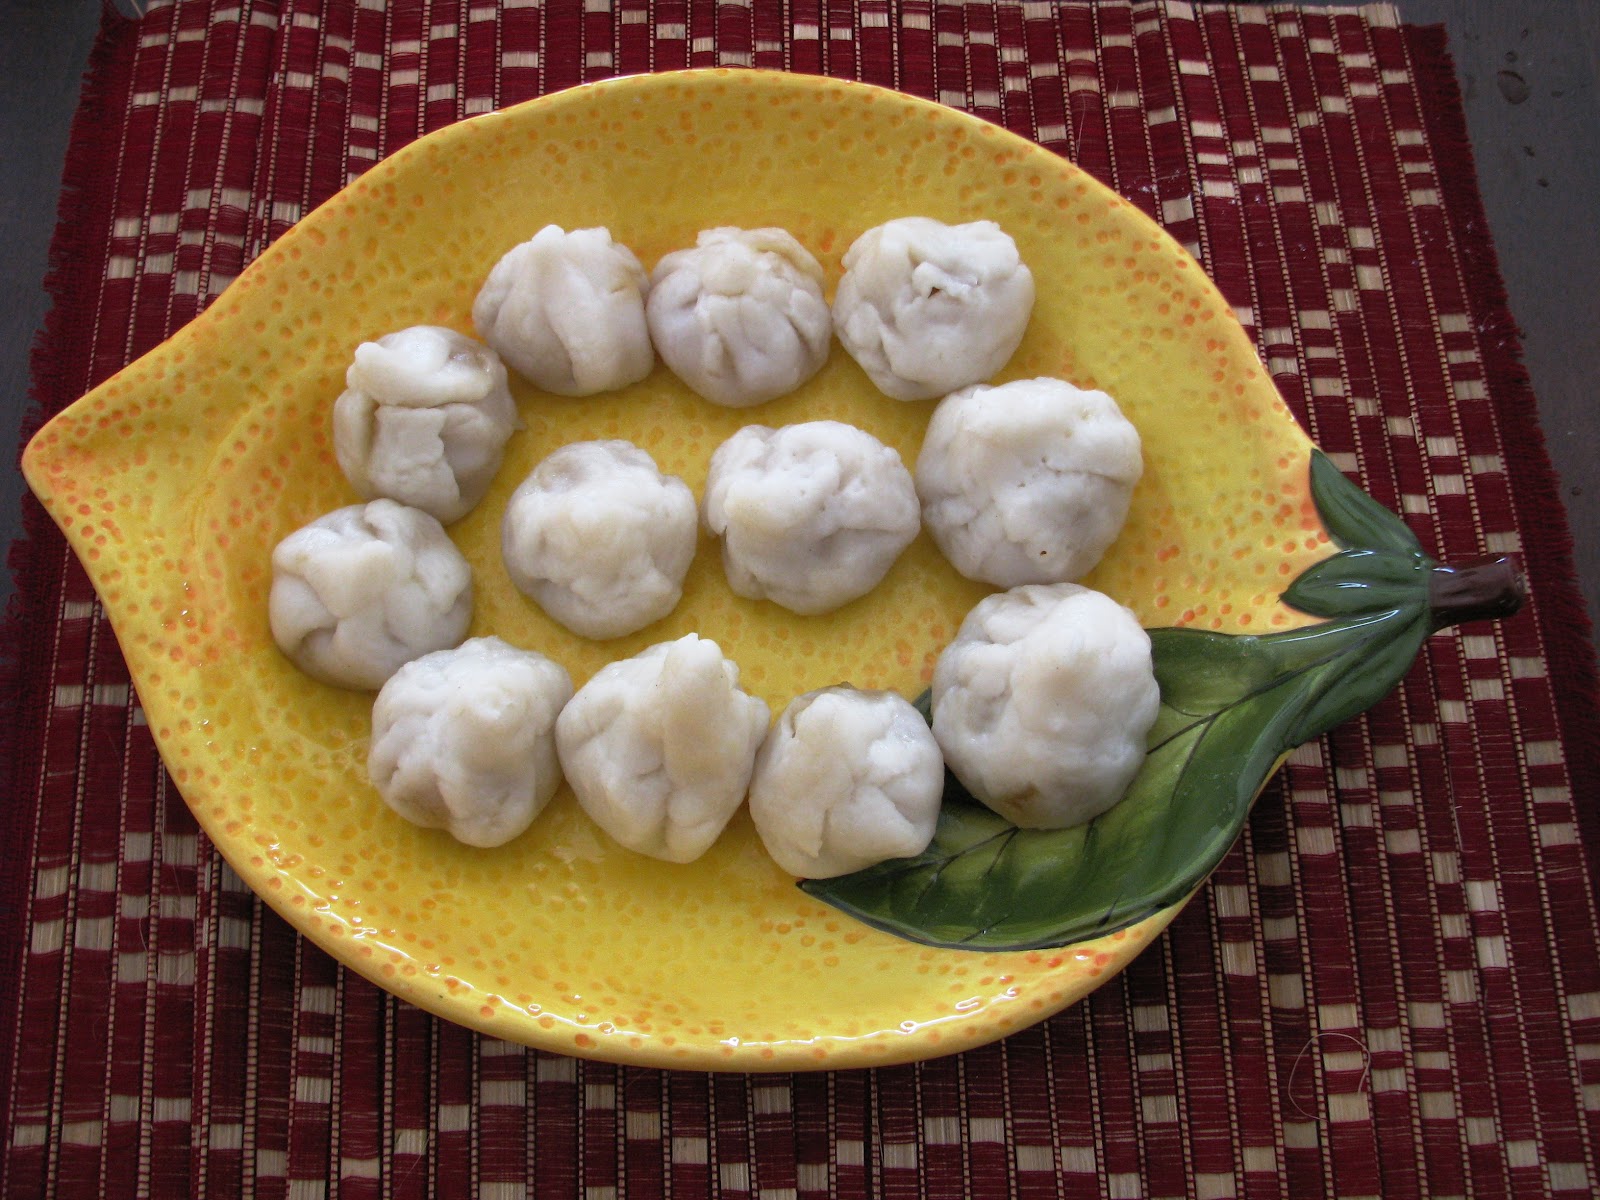
And here was the output :)