
Oothapam is a heavier, thicker, softer, Dosai. While dosai could be called a crepe, oothapam could be called a pancake - a savory one. When hot, they are crispy on the outside and soft and fluffy in the inside. The batter for oothapam can be prepared in the same manner as preparing idli batter. Left over fermented idli batter after a day of making idlis can be used to prepare oothapam. Or, this dosai batter that I posted yesterday can be used too. The only slight differences in making oothapam are
- The oothapam batter will be slightly thicker to make fat dosais. So don't add too much water while preparing the batter. Or, if you leave behind the vendhaya dosai batter for a day, it will naturally turn slightly thick and will be ideal to make oothapams.
- The oothapam batter is not spread into a thin circle while preparation. A ladle (or two ladles) of batter is poured gently on the pan and is left to cook. Pretty much like making pancakes.

Since my in-laws prepared this oothapam using the vendhaya dosa batter, I'm copy pasting most of the previous post's ingredients and preparation descriptions. I hope no one accuses me of self-plagiarizing ;)
In this variation of oothapam, finely chopped onions are added to the batter. It adds a depth of flavor and crunchiness that's simply great. You can add other vegetables, ginger, or other spices of your choice.
Ingredients:
- 3 cups parboiled rice
- 1/2 cup white raw rice
- 3/4 cup whole, de-husked urad dhal / ulundu / black gram dhal
- 1 teaspoon fenugreek seeds / vendhayam
- a few teaspoons sesame oil
- 2 teaspoons salt (or as needed)
- 1 medium/small onion, finely chopped.
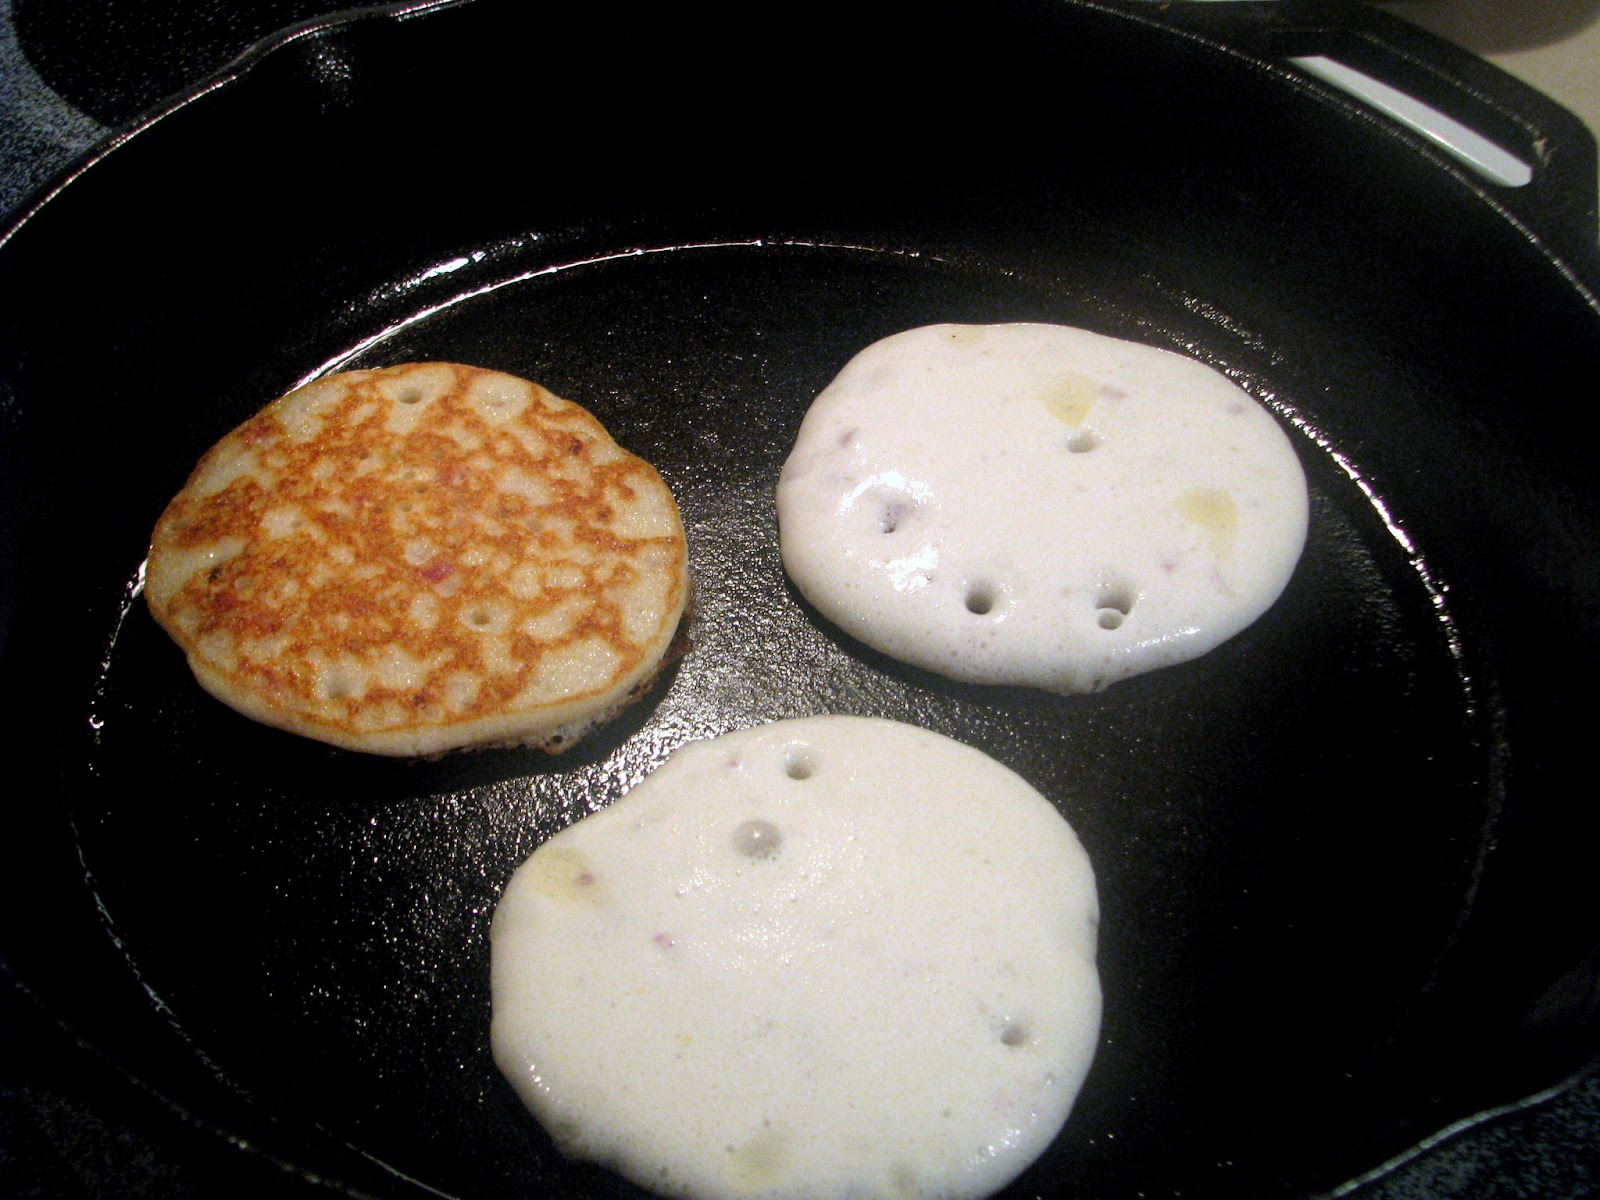
mini oothapams with one ladle of batter
Preparation:
- Soak the parboiled rice and raw rice (together) for 4-8 hours. Let the water level come up to 3 inches above the rice
- Soak the urad dhal and fenugreek for for 1-2 hours.
- Grind the urad dhal in a wet-grinder or a powerful mixie/blender with about 1/2 cup of water until it is fluffy and soft. The consistency of the batter should not be too thick nor too runny. If you lift the batter with a spatula and point it down, the batter shouldn’t run or plop down immediately. It should be a sticky (not greasy, but gooey) lump that stays on the spatula and eventually crawls down.
- If using a wet-grinder, slowly add the soaked (and drained) rice to the ground urad dhal batter and continue grinding until the rice is ground well to a near-smooth consistency. Add about 2 cups of water to grind. Adjust the water depending on the type of rice you are grinding. If using a blender, remove the urad dhal batter and grind the rice in batches.
- Transfer the prepared batter in a bowl, add salt and mix well with your clean hand. When poured, the prepared batter should fall down in ribbons.
- Set aside the batter for about 8 hours. It is highly unlikely that it would ferment in a cold, dry place (such as where I live). The batter didn't rise or ferment here. But in India, it might ferment easily. So, store the batter in an appropriate bowl to give room for it to ferment.
- After 8 hours, check the batter. If it has thickened, add some water to dilute it to the consistency of pancake batter. When poured, the batter should fall in easy ribbons. When dropped or ladled on a plate, the batter should spread slightly but not run. When the batter is ready, add the chopped onions/vegetables to it and mix well.
- Heat a cast-iron skillet or a non-stick skillet on high heat. When the skillet is piping hot, reduce the heat to medium. Pour a ladle of batter onto the center. Do not spread it out. One ladle results in mini oothapam (which is what my father-in-law made). Two ladles will result in a slightly bigger, fatter oothapam.
- Spoon a little bit of sesame oil around the edges of the oothapam.. This step is optional, of course. For the uber diet-conscious person, this may seem unnecessary, especially if using a non-stick skillet. But the sesame oil infuses a delicate flavor and aroma that comes to be associated with the intrinsic taste of dosai.
- Wait for about 2-3 minutes for the oothapam to crisp/cook on one side. Then carefully flip the dosai onto the other side using a flat, broad spatula.You may again spoon some sesame oil around the edges. Wait for about 2 minutes. Flip the oothapam. If you are satisfied that it is cooked (the batter isn’t raw in patches, and the dosai has lots of little bubbles of escaped steam/air), transfer it onto a plate.

Serve with any spicy side-dish! These were yummy oothapams, thanks to my father-in-law's meticulous preparation!
No comments:
Post a Comment
Thanks for leaving a comment! I appreciate it.
Note: Only a member of this blog may post a comment.